Waffle Maker Hash Browns
Waffle maker hash browns may sound somewhat… unusual. But I promise you, once you try this simple hack, you’ll be having hash browns every morning.
If you love hash browns, you’ll be amazed how easy they are to make, especially if you have a waffle maker in your kitchen. Plus, hash browns make a great breakfast with minimal ingredients.
Why You’ll Love This Recipe
- This recipe requires a total of FOUR ingredients. Four. Let that sink in! It really goes to show that some of the best foods take it back to basics.
- A lot of people don’t realize how quick and easy hash browns are to make at home. Long term, it’s a great recipe to have on hand, especially considering it is basically just… potatoes!
- Most commercially sold hash browns use wheat flour as a binding material. Understandably, it is inconvenient and unsuitable for those who suffer from a gluten allergy, intolerance, or Celiac disease. This waffle maker hash browns recipe is actually so minimalistic, it requires no flour at all, making it gluten-free!
- The beauty of potatoes is that they go with everything. Just like these waffle maker hash browns! You can enjoy them with your favorite condiment, or as part of a full English breakfast.
- Hash browns are the ultimate comfort food. Need I say more?

What Are Hash Browns?
Hashbrowns are a popular breakfast dish made from grated or shredded potatoes that are typically fried until crispy and golden brown. The name “hashbrowns” comes from the way the potatoes are “hashed” or chopped into small pieces before cooking.
To make hashbrowns, potatoes are peeled and then either grated or shredded using a box grater or a food processor. The shredded potatoes are often rinsed or soaked in cold water to remove excess starch, which helps them cook up crispy. After draining and squeezing out any excess moisture, the shredded potatoes are seasoned with salt and pepper or other seasonings according to personal preference.
Many traditional recipes also include some all-purpose flour to help the mixture stick together before frying the shredded potatoes in a skillet with some oil or butter until they are cooked through. The cooking process allows the potatoes to form a crispy crust on the outside while remaining tender on the inside.
Equipment You’ll Need for This Recipe
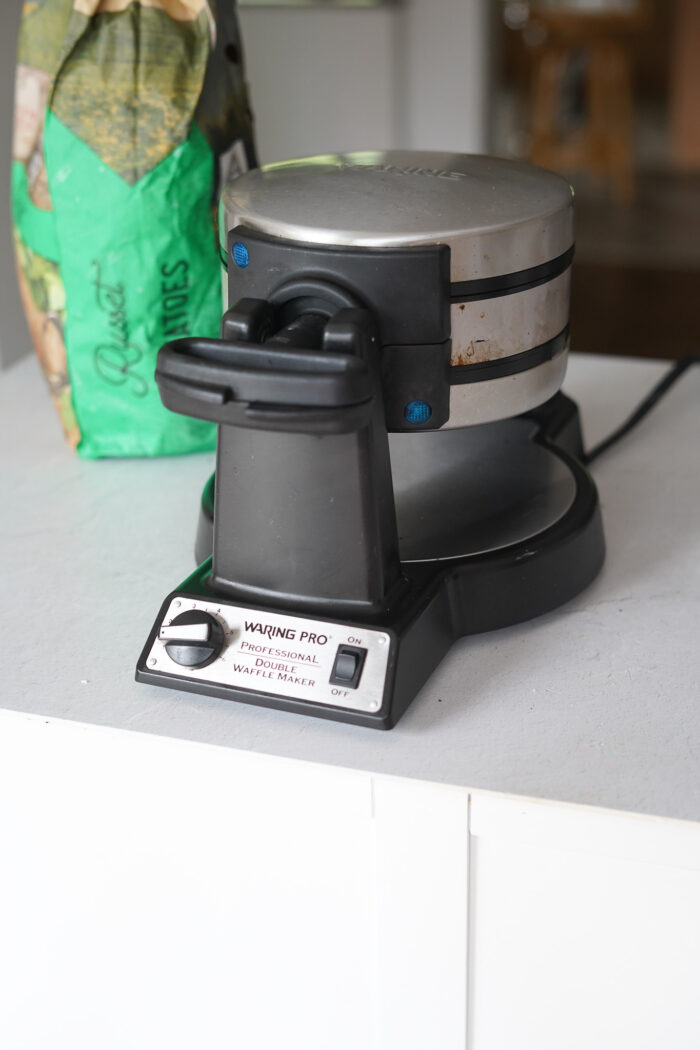
As you may have already guessed from the title, the main piece of equipment you’ll need for this recipe is a waffle maker. Any functioning waffle maker will do the job!
I got quite lucky and stumbled upon an amazing double waffle maker at a thift store for only $10 that usually retails for a thousand bucks. However, these days there are plenty of budget-friendly options similar to the one I have.
The other kitchen essential you will need is something to strain out the excess liquid from potatoes. You can use a nut milk bag, cheesecloth, or a clean kitchen towel to perform this step.
Naturally, you will also need a way to shred the potatoes. You can use a regular cheese grater or speed up the process by using a food processor.
Lastly, to stop the potato mixture from sticking inside the grooves of a waffle maker, I would strongly recommend using a generous amount of cooking spray. Alternatively, you can brush the hot waffle maker with some oil or vegan butter before adding potatoes.
How to Make This Recipe
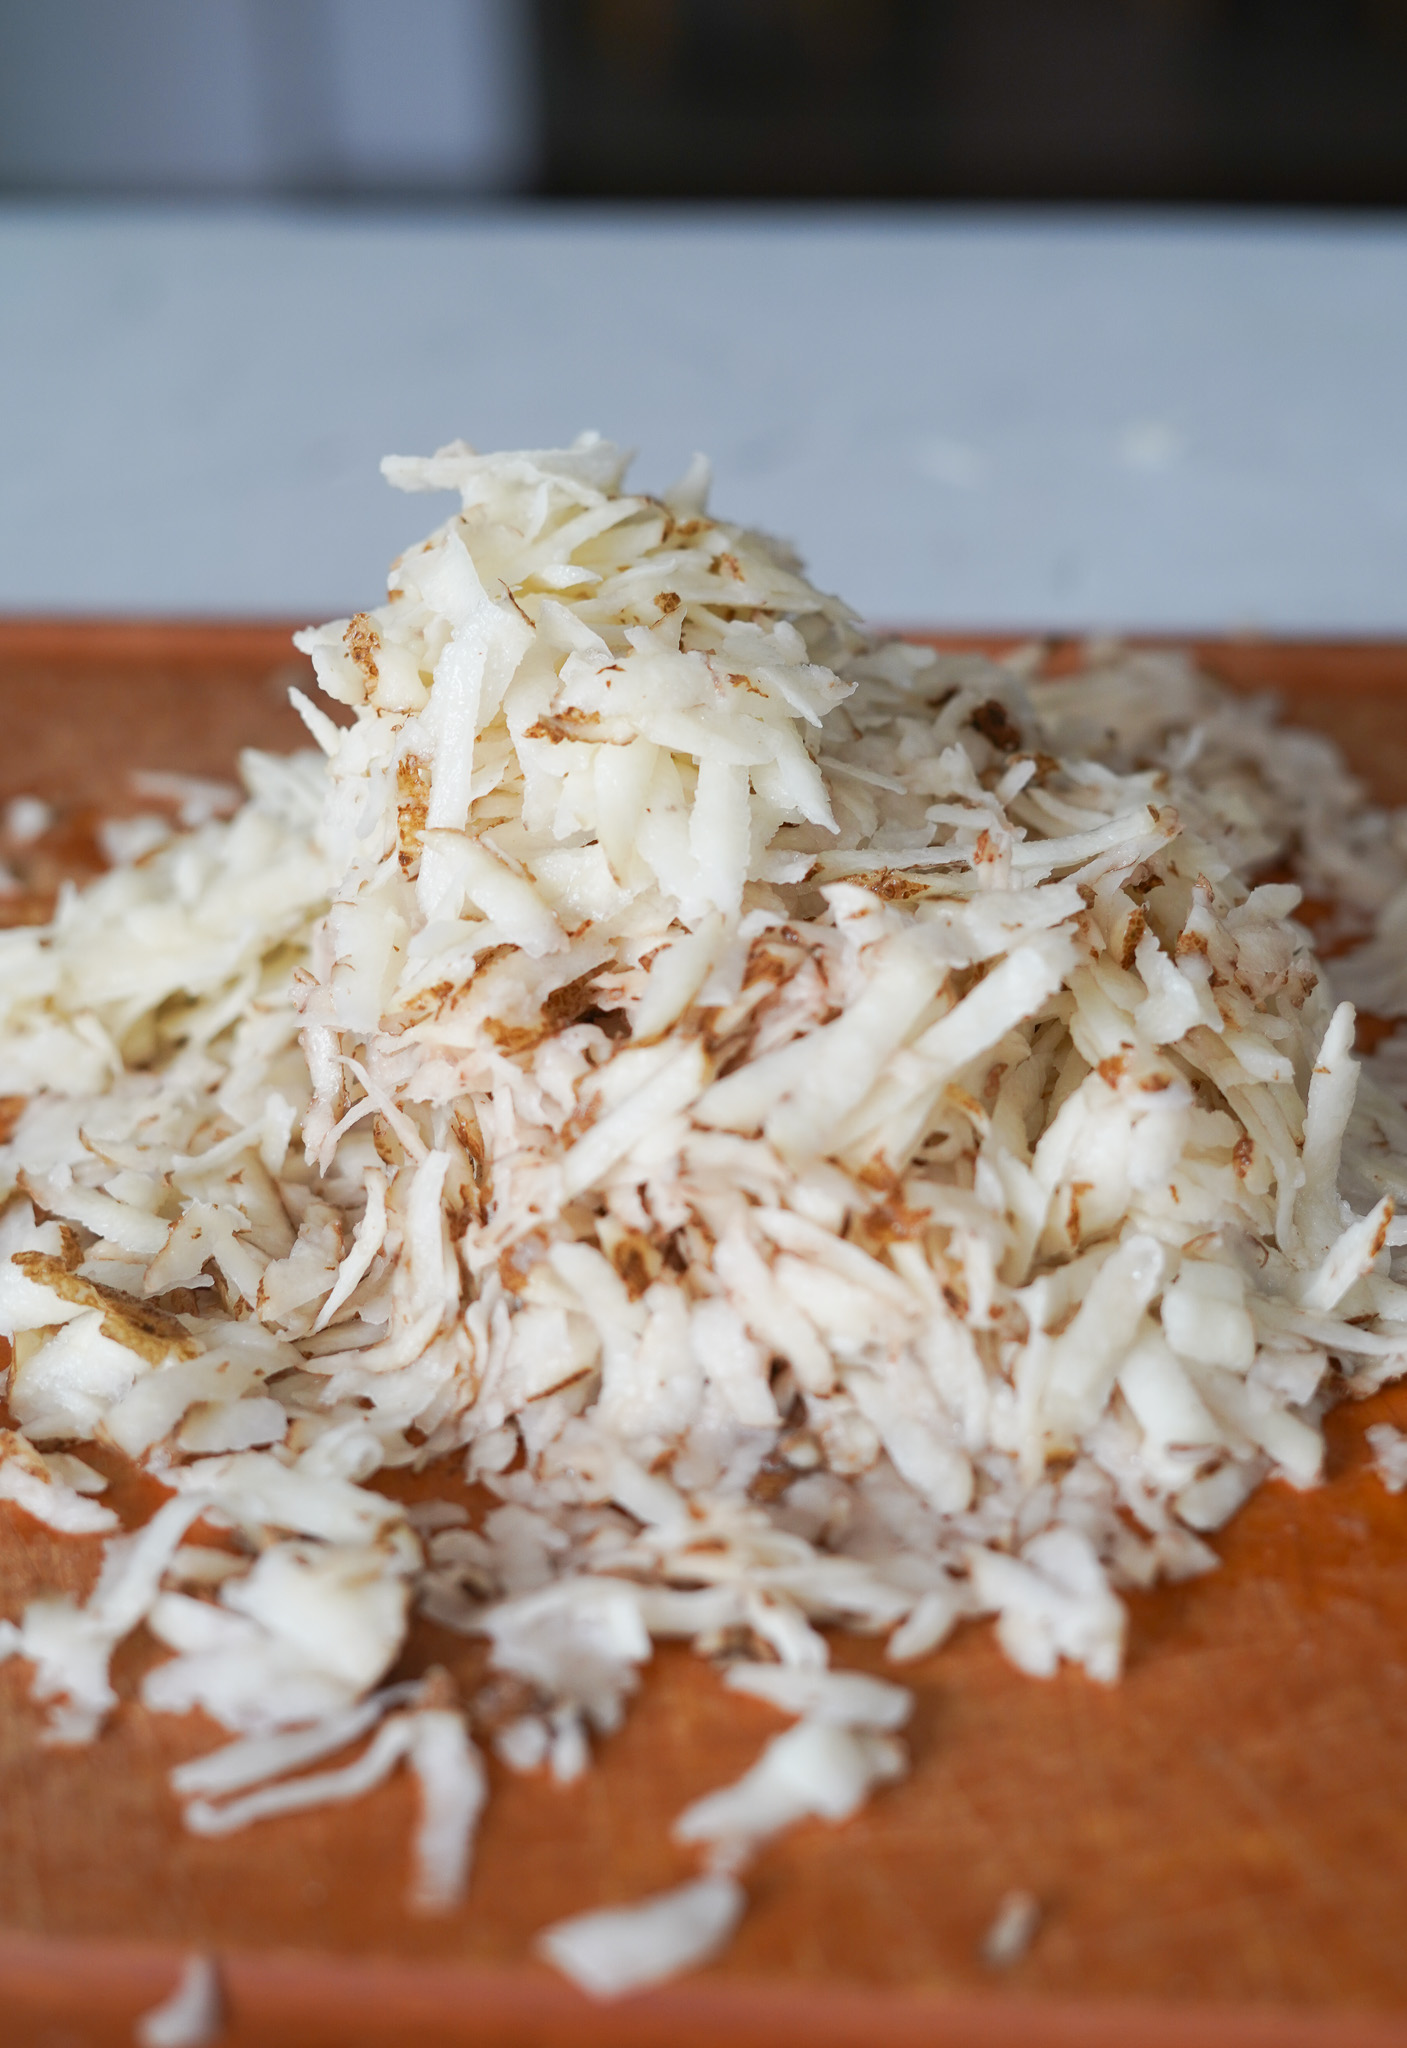
First, shred the russet potatoes. I used a simple grater.
Transfer potatoes to a bowl, and sprinkle them with half the salt. Using your hands or a fork, mix everything together so that the salt is evenly distributed throughout. Set aside for 10 minutes or so. This process will draw out the moisture and ensure that the shredded potatoes stick together during cooking.
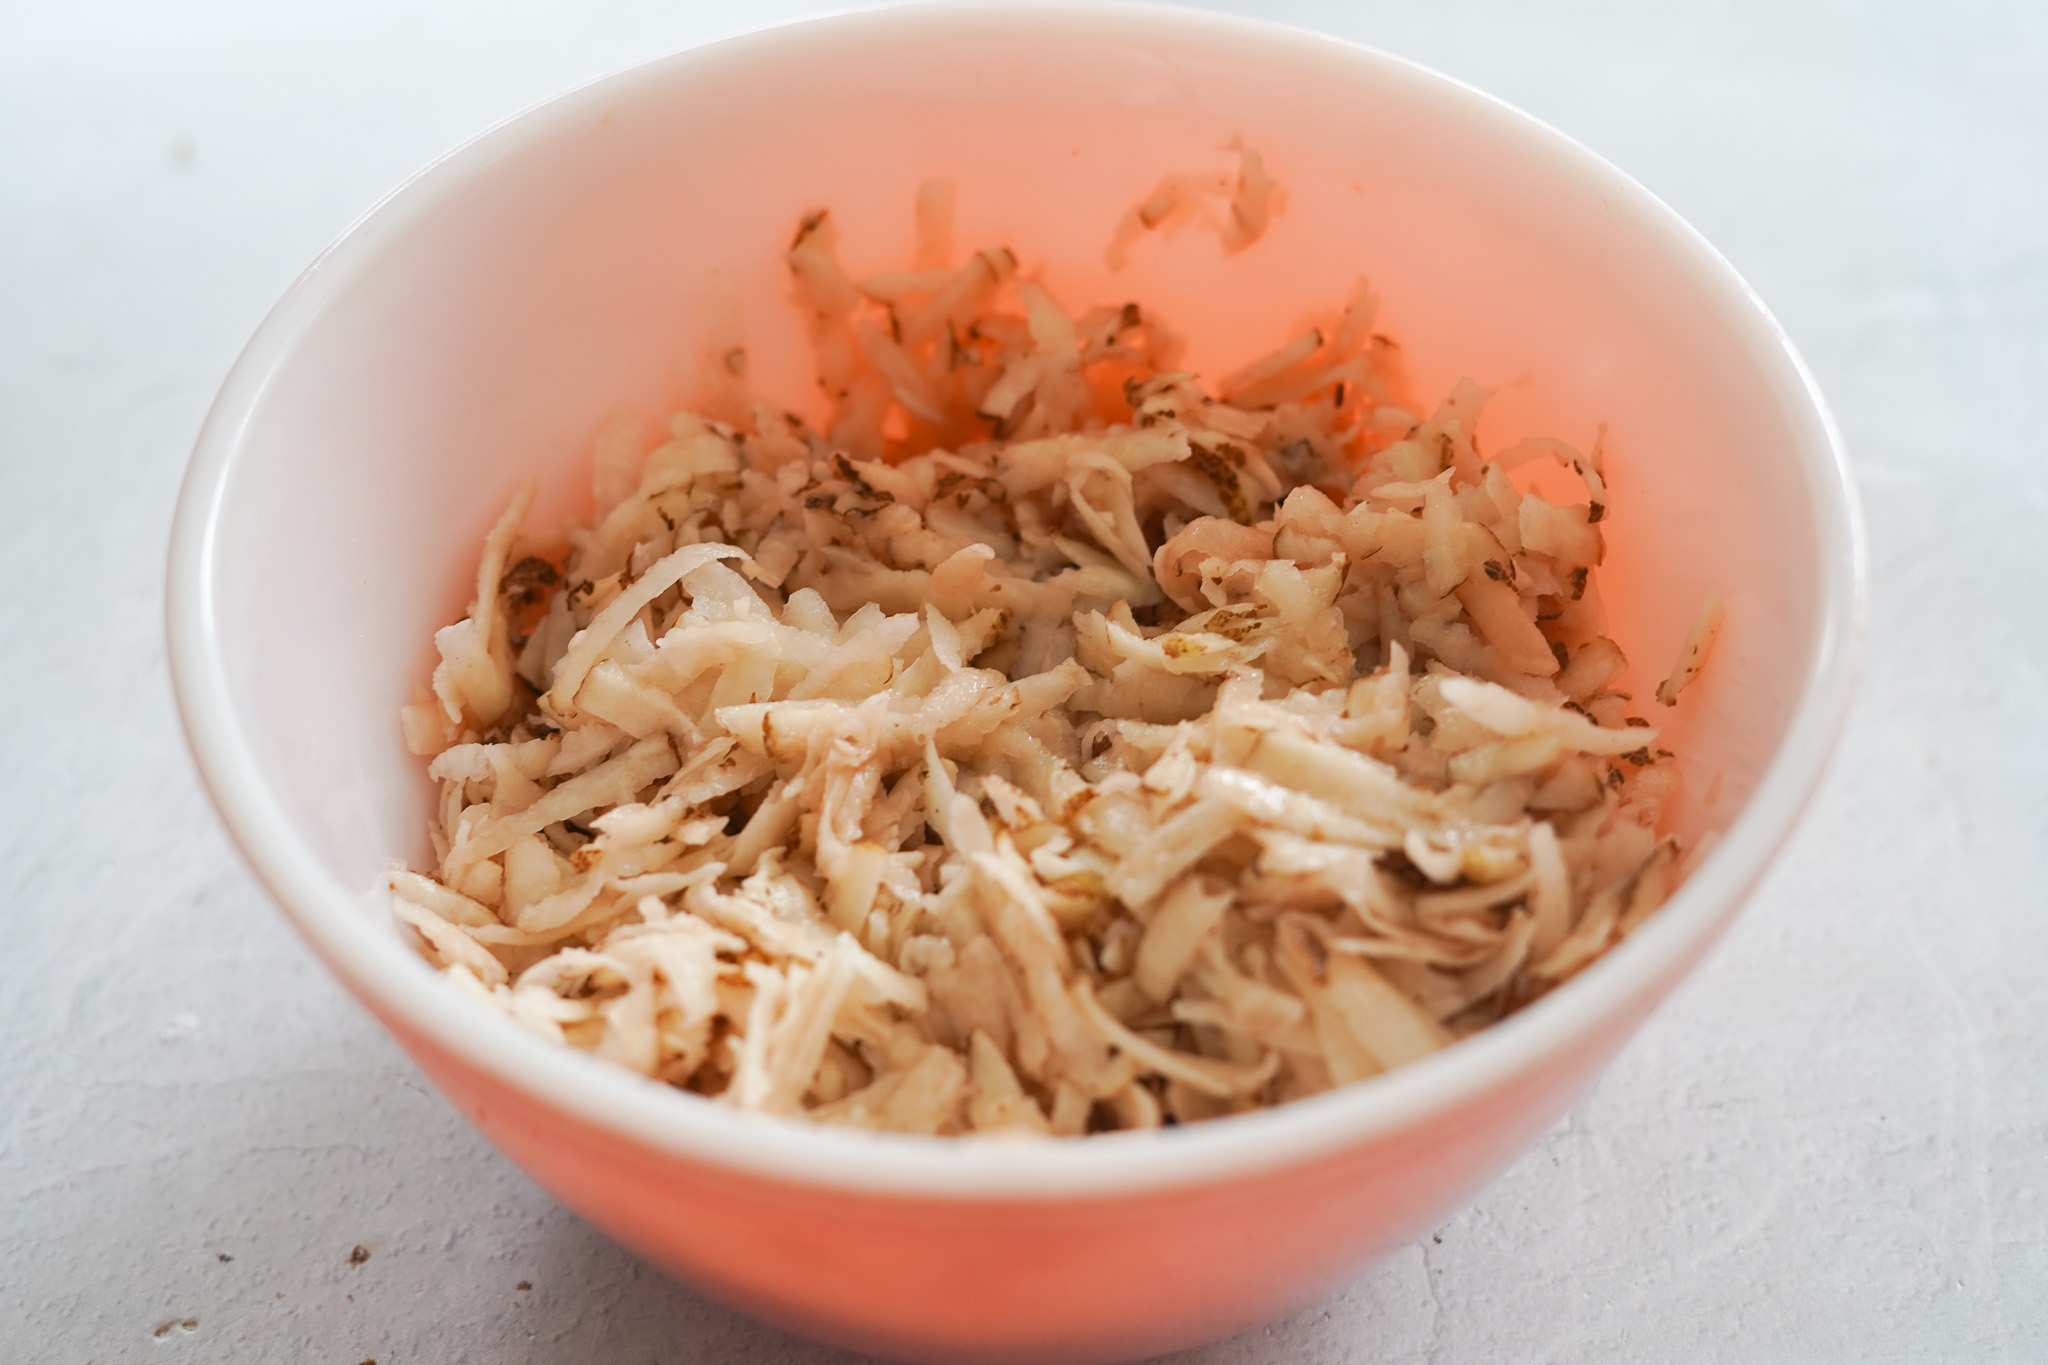
Next, strain as much liquid out of the potatoes as possible using a cloth or a nut milk bag. Transfer the potatoes back into the bowl, adding the rest of the salt, nutritional yeast, and garlic powder. Mix everything thoroughly together.
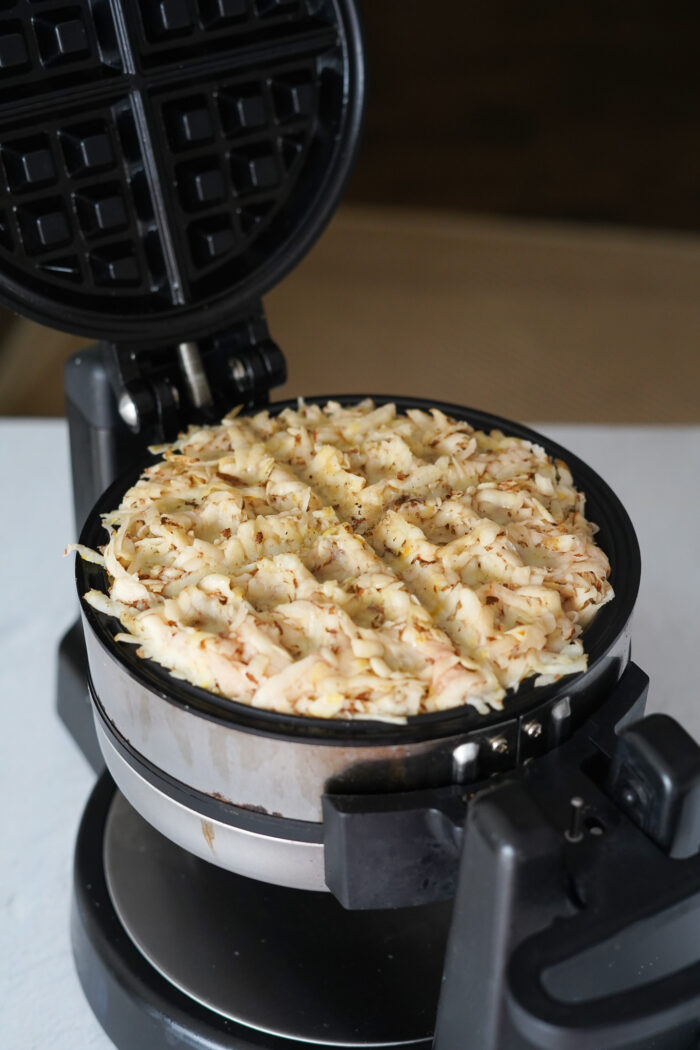
Preheat your waffle iron and grease it generally with oil or cooking spray. If your waffle iron has a heat setting, turn it to medium-high.
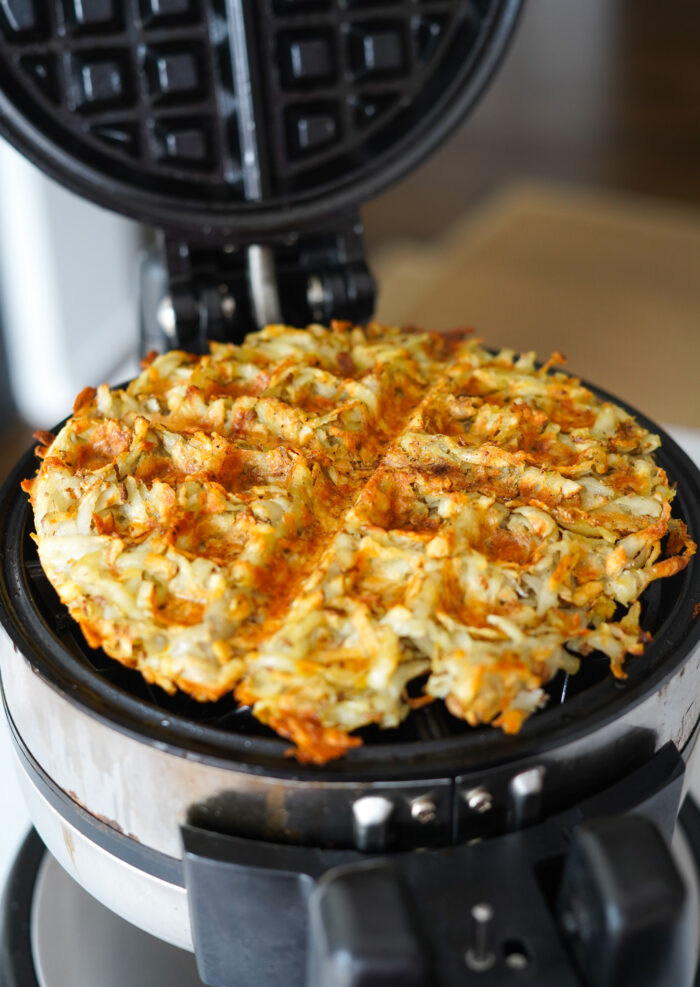
Add some of the grated potato mixture into the waffle iron until it is slightly overfilled. Close it and allow it to cook for five minutes before you begin to check on it from time to time to avoid burning.
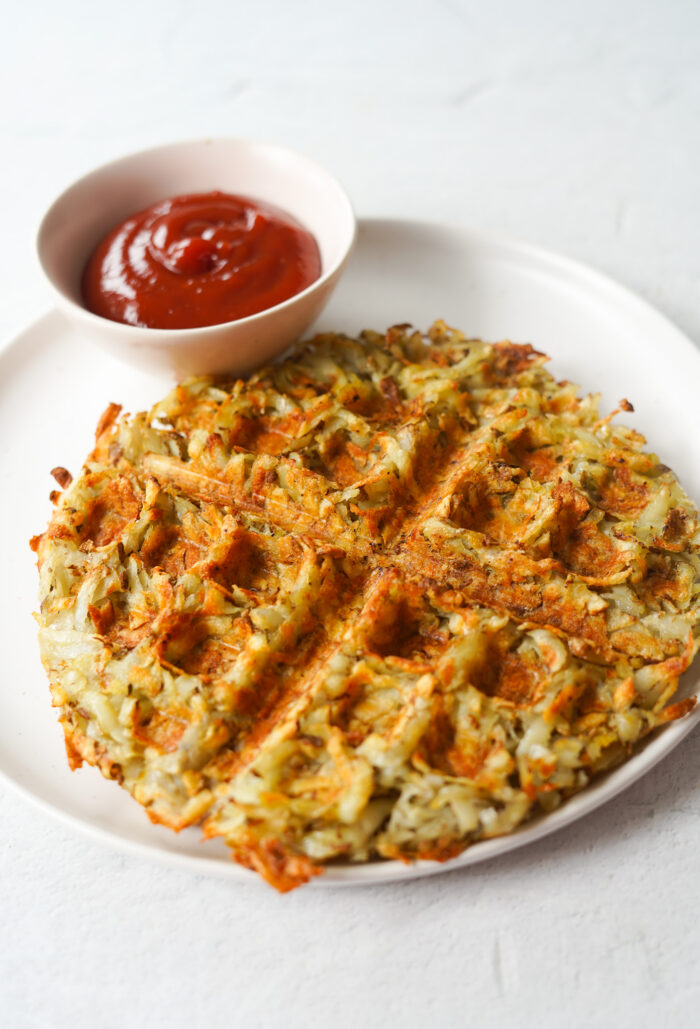
For a classic hash brown, what we are trying to achieve is a crispy, golden brown outside layer, while the inside is soft and fluffy, as the potatoes cook. Once your hash brown waffle is ready, unplug and safely remove it from the waffle maker. Serve with your favorite condiment or as part of a larger breakfast plate.
Hack It!
- There are several different way to modify this recipe to your liking. For instance, you can try playing around with spices and seasonings. This recipe uses minimal ingredients, but you can add more spices, herbs, and even a little bit of heat.
- Similarly, you can add other veggies to the mixture. For instance, you could add some chopped peppers, sun dried tomatoes, or zucchini. Alternatively, you could use sweet potato instead of regular russet potatoes. Just remember to drain out as much liquid as possible to make the mixture stick together.
- If you’re struggling to make the potato mixture stay cohesive, feel free to add a little bit of flour. You can use all-purpose wheat flour, or a gluten-free alternative, such as oat or chickpea flour.
- To remove excess starch, you can perform an extra step of soaking your grated potatoes in cold water and rinsing a few times until the water runs clear.
How to Serve Waffle Maker Hash Browns
- Classic breakfast. Serve hashbrowns alongside other classic breakfast items, such as vegan bacon, scrambled tofu, fried mushrooms, and toast. This combination makes for a hearty and satisfying morning meal.
- Breakfast burrito. Use hashbrowns as a filling for breakfast burritos. In a tortilla, add hash browns, scrambled tofu, vegan cream cheese, salsa, and some greens for a portable and tasty breakfast on the go.
- Loaded hashbrowns. Top your hashbrowns with an array of your favorite toppings like tofu “ground beef”, baked beans, or stewed oyster mushrooms for a loaded and indulgent dish.
- Hashbrown and vegetable stir-fry. Stir-fry hashbrowns with a mix of colorful vegetables like bell peppers, broccoli, and zucchini. Add some soy sauce or your preferred seasoning for a flavorful and quick meal.
- Hashbrown sandwich. This option is particularly great for those who cannot eat gluten. Simply use two of your waffle maker hash browns instead of bread, and enjoy them with your favorite plant-based sandwich filling.

Other Recipes You’ll Love
- Oatmeal Breakfast Cookies
- Homemade Ketchup
- Easy Vegan Brown Gravy
- Healthy Homemade Granola
- Overnight Oat Buns
Although the WFPB diet is a great way to buttress your well-being, it doesn’t protect you from deficiencies. So instead of taking a million different supplements, I have recently collaborated with Complement to release an all-in-one multi-nutrient supplement for plant-based and plant-centric eaters. Pssst… It’s not too late to grab a 15% discount on a subscription package!
If you enjoy simple yet filling recipes like this one, I suggest you get your hands on the PlantYou Cookbook. It has over 140 recipes, all rather affordable and beginner-friendly. In addition, each recipe is accompanied by an infographic to display every ingredient. Perfect for visual learners like myself.
And if you want more inspiration on delicious breakfast items, join the PlantYou Planner! It’s an incredible vegan meal planner app that allows you to choose from a huge database of delicious wholesome recipes. Once you join, you get access to ALL 600+ recipes, and the best part? You can toggle the number of servings! No more wasted food or sad-looking veggies in your fridge.

The Recipe: Waffle Maker Hash Browns
Ingredients
- 3 russet potatoes, shredded
- 1 tsp salt
- 2 tbsp nutritional yeast
- ½ tsp garlic powder
Equipment
- Waffle Maker
- Thin cloth or nut milk bag
Instructions
- First, grate the russet potatoes. Transfer to a bowl, and sprinkle half the salt over top. Using your hands or a fork, disperse the salt evenly through the grated potatoes. Allow to sit for 10 minutes.
- Then using a clean thin cloth or a nut milk bag, drain as much liquid out of the potatoes as possible. Dispose of the liquid, and transfer the potatoes back into the bowl. Add the remaining salt, nutritional yeast and garlic powder.
- Coat the waffle iron with spray oil or using a barbecue brush, liberally add oil to the waffle iron grates to avoid any sticking. Transfer the grated potato mixture onto the waffle iron until slightly over-stuffed and close. If your waffle iron has a heat setting, turn it to medium-high.
- Allow to cook for five minutes before you begin intermittently checking to avoid burning. The potatoes are ready when they are crispy on top and golden brown. Unplug and safely remove from the waffle iron using a silicone spatula. Serve with ketchup as desired.